3D rendering has become one of the most powerful tools in modern design — helping architects, product developers, and marketers visualize concepts long before they exist. However, achieving a polished, photorealistic, and professional render isn’t always easy.
Even experienced artists make mistakes that can make a project look unrealistic, unbalanced, or simply off. The good news? Most of these errors are easy to fix once you know what to look for.
In this guide, we’ll explore the most common 3D rendering mistakes — and practical tips on how to avoid them for better, more professional results.
1. Poor Lighting Setup
Lighting is one of the most crucial elements in 3D rendering. It determines the mood, realism, and overall visual appeal of your scene.
A common mistake is using flat or unrealistic lighting, which can make even the best 3D model look lifeless.
Common Issues:
Overexposed or underexposed renders
Light coming from unnatural directions
Lack of shadows or overly harsh ones
Ignoring global illumination
How to Avoid It:
Study real-world lighting and replicate it in your render setup.
Use HDRI maps for natural lighting and reflections.
Experiment with three-point lighting for product or character renders.
Balance light intensity — your goal is to highlight form and texture, not wash them out.
Pro Tip: Subtle lighting differences can dramatically change the mood. Try warm tones for cozy interiors and cooler tones for tech or industrial visuals.
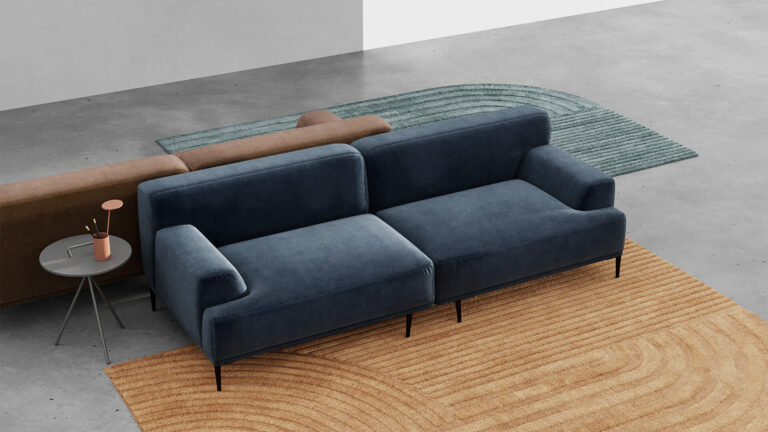
2. Unrealistic Materials and Textures
Textures add realism, but overdoing them or using low-quality materials can ruin your scene. Common issues include stretching textures, low-resolution maps, or materials that don’t react naturally to light.
Common Issues:
Blurry or pixelated textures
Repetitive texture patterns (tiling)
Wrong material settings (e.g., plastic behaving like metal)
Missing bump, roughness, or reflection maps
How to Avoid It:
Always use high-resolution texture maps.
Adjust UV mapping to prevent stretching or repetition.
Use PBR (Physically Based Rendering) materials to ensure realistic surface behavior.
Layer materials — combine bump, displacement, and specular maps for depth.
Pro Tip: Observe how real-world materials react to light. A polished marble floor should reflect differently from a matte wooden table.
3. Weak Composition and Camera Angles
Even if your 3D scene is flawless, poor composition can make it look dull or confusing. A bad camera angle can distort proportions, hide details, or fail to highlight your design’s strengths.
Common Issues:
Crooked horizons
Too much empty space or cluttered framing
Unnatural camera height or perspective
How to Avoid It:
Follow basic photography principles — rule of thirds, leading lines, and balance.
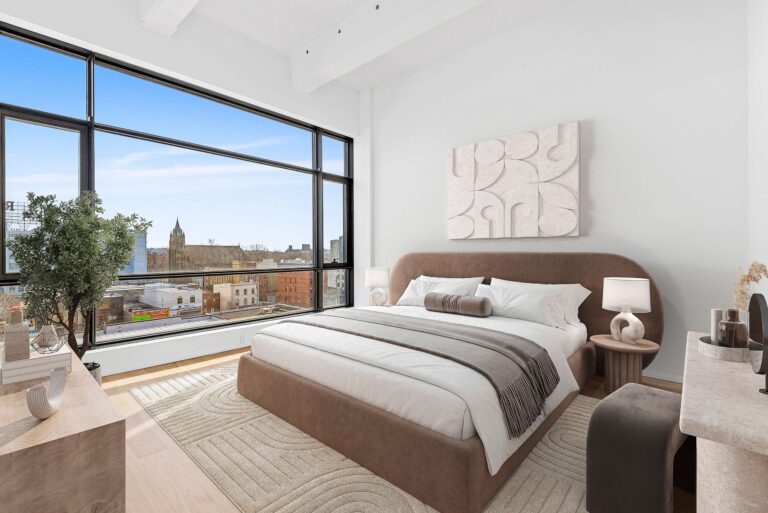
Keep your camera at human-eye level for architecture and interiors (around 1.5m–1.7m).
Use depth of field to guide the viewer’s eye to key areas.
Render multiple viewpoints and pick the most natural one.
Pro Tip: Treat your render like a photograph — framing and storytelling matter just as much as technical perfection.
4. Missing Scale and Context
A common mistake among beginners is creating renders that look “off” because of incorrect scale or missing context. If your furniture is oversized, or a door is half the expected height, the viewer instantly senses something is wrong.
Common Issues:
Models not to scale
Empty environments without context (like missing floors or background objects)
Inconsistent object proportions
How to Avoid It:
Always model to real-world dimensions (in meters or inches).
Add reference elements like human figures, plants, or décor to give scale.
Use background environments or HDRIs for realistic context.
Pro Tip: When in doubt, compare your model size to standard references — for example, a door is usually around 2 meters tall.
5. Over-Rendering or Over-Editing
In an attempt to make images look impressive, some artists push post-processing too far — over-sharpening, over-saturating, or adding unnecessary glow effects. The result? A fake, plastic-looking render.
Common Issues:
Unrealistic colors
Excessive brightness or contrast
Artificial lens flares or vignette effects
How to Avoid It:
Keep post-production subtle — use Photoshop or Lightroom for light correction, not reconstruction.
Compare your final image with real photos to maintain believability.
Let your rendering engine handle most of the realism instead of relying on heavy edits.
💡 Pro Tip: Less is more. Realism comes from accuracy, not filters.
6. Ignoring Details and Imperfections
Real life isn’t perfect — and neither should your render be. Overly clean and symmetrical renders look computer-generated because they lack natural imperfections.
Common Issues:
Perfectly smooth surfaces
Identical object placement
No fingerprints, smudges, or wear on materials
How to Avoid It:
Add subtle imperfections: dust, wrinkles, scratches, or fingerprints.
Randomize object positioning slightly to mimic reality.
Use displacement or normal maps for small surface irregularities.
Pro Tip: Imperfections add authenticity. A slightly messy pillow or uneven wood grain can make your scene feel alive.
7. Not Optimizing Render Settings
Sometimes the problem isn’t artistic — it’s technical. Poor render settings can cause noise, grain, or long render times that slow production.
Common Issues:
Too few samples causing grainy images
Incorrect render resolution
Missing anti-aliasing or GI settings
How to Avoid It:
Use progressive rendering for test previews and fine-tune before the final render.
Render in high resolution (at least 2K or 4K) for professional results.
Learn your rendering software’s quality vs. speed trade-offs.
Pro Tip: Optimize for both quality and time — don’t max out every setting if it doesn’t improve visible results.
Conclusion
3D rendering is both an art and a science. While technology has made it easier than ever to create realistic visuals, small mistakes can still hold your work back.
By paying attention to lighting, materials, composition, and realism, you can produce stunning, professional-quality renders that not only impress clients but also communicate your design vision effectively.
Whether you’re rendering architecture, interiors, furniture, or products — always remember: realism lies in the details.