In today’s visual-first world, 3D rendering has become an essential tool for designers, architects, product manufacturers, and marketers. Whether you’re creating a stunning architectural visualization or a photorealistic furniture catalog, the rendering style you choose can make or break your presentation.
Different projects require different moods, levels of detail, and artistic intent — and understanding how to match these with the right rendering style is key to getting the results you want.
In this guide, we’ll walk you through the most common 3D rendering styles, when to use each, and how to choose the one that best suits your project goals.
What Is a 3D Rendering Style?
A 3D rendering style defines the overall look and feel of your visuals — from hyper-realistic textures to soft conceptual sketches. It’s not just about realism; it’s about communication.
Your rendering style should:
Match your brand identity
Support your design intent
Appeal to your target audience
Serve the purpose of your visualization (marketing, presentation, prototype, etc.)
The Main Types of 3D Rendering Styles
Let’s look at the most popular styles used across industries today:
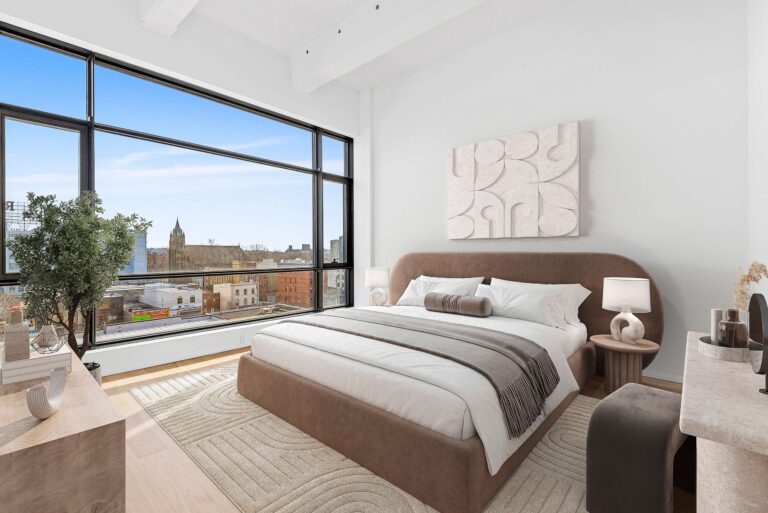
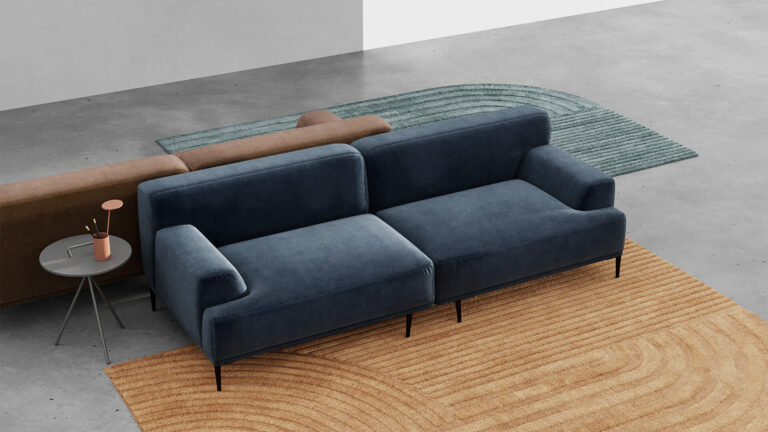
1. Photorealistic Rendering
This is the most widely recognized style, often used in architecture, product visualization, and interior design. It mimics real-world lighting, shadows, and textures so accurately that it’s often hard to tell if the image is a photograph or a render.
Best For:
Real estate marketing visuals
Furniture catalogs and e-commerce
Architectural presentations
Interior design showcases
Why Choose It:
Photorealistic renders create emotional impact and instant trust — perfect for marketing or client approval stages.
2. Non-Photorealistic / Artistic Rendering
Sometimes, you don’t need photo-level detail. Artistic or stylized rendering focuses on mood, concept, and creativity — ideal for storytelling and design exploration.
Best For:
Early design concepts and proposals
Educational or promotional visuals
Game design or animation previews
Why Choose It:
This style communicates ideas quickly, without overwhelming detail. It allows more creative freedom and can be adjusted for branding aesthetics.
3. White Model / Clay Rendering
A minimalistic rendering style with no colors or textures — just shades, shadows, and lighting. Clay renders are often used during the design development phase.
Best For:
Architectural massing and form studies
Early-stage product design
Lighting and shadow analysis
Why Choose It:
It strips away distractions, focusing purely on shape, form, and proportion.
4. Wireframe Rendering
A technical rendering that displays the skeletal structure of a 3D model. It’s often used to showcase modeling techniques or provide transparent visuals for engineering teams.
Best For:
Demonstrating model complexity
Engineering or 3D modeling tutorials
Client presentations showing design progress
Why Choose It:
It’s an excellent tool for technical clarity and showcasing the design process.
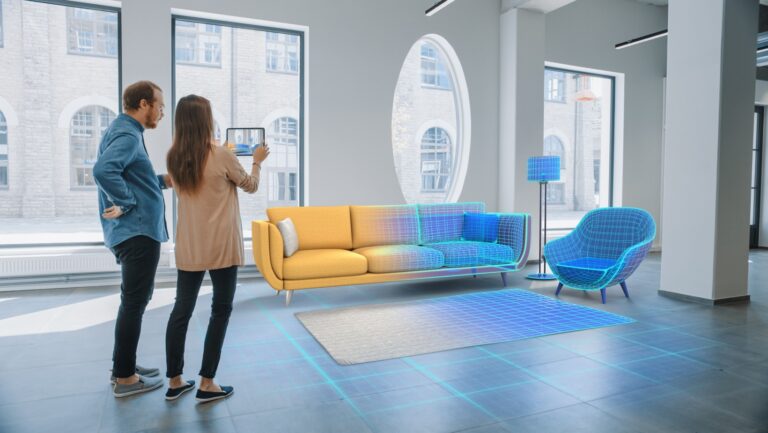
5. Real-Time Rendering
Used in gaming, VR, and interactive product visualization, real-time rendering allows users to explore scenes instantly and make adjustments on the go.
Best For:
AR/VR applications
Interactive design reviews
Real estate walkthroughs
Product configurators
Why Choose It:
Real-time rendering provides immediate feedback and immersive interaction — perfect for presentations and client engagement.
How to Choose the Right 3D Rendering Style
Picking the perfect rendering style isn’t just about aesthetics — it’s a strategic decision based on your goals, audience, and use case.
Here’s how to narrow it down:
1. Define Your Purpose
Ask yourself:
Is this render for marketing, client presentation, or internal design review?
Do you want to impress, inform, or test a concept?
Example:
If your goal is to attract buyers, photorealistic renders work best.
If your goal is to experiment with ideas, clay or conceptual renders are more efficient.
2. Understand Your Audience
Who will see your renders?
Clients expect visual realism to understand the final result.
Design teams prefer simple styles that allow focus on structure.
Investors or marketers respond better to visually stunning, emotionally engaging renders.
3. Consider Project Stage
Early Stage: Use conceptual or clay renders to explore ideas quickly.
Mid Stage: Switch to semi-realistic or white model renders for client review.
Final Stage: Use photorealistic or real-time renders for marketing and presentation.
4. Evaluate Budget and Time
Photorealistic and animation renders require more time and computing power. If you’re working with a limited budget or a tight deadline, opt for simplified rendering styles that still communicate your design effectively.
5. Match with Platform or Purpose
For web and social media, use fast-loading real-time or optimized photorealistic renders.
For VR/AR presentations, go with real-time or interactive rendering.
For print catalogs, use high-resolution photorealistic images.
Future Trends in 3D Rendering Styles
As technology evolves, new rendering possibilities are emerging:
AI-assisted rendering for faster output and enhanced realism
Real-time ray tracing for cinematic lighting
Hybrid rendering (combining photorealistic and interactive styles)
Sustainable visualization, reducing rendering energy consumption
Businesses that adopt these trends early will gain a competitive edge in visual marketing and creative design.
Conclusion
Choosing the right 3D rendering style is about aligning purpose, audience, and aesthetics. From sleek photorealistic images to stylized concept renders, each approach has its own strengths.
Before starting your next project, take time to evaluate your goals and communicate them clearly with your rendering team. The right style will not only elevate your visuals but also help you tell your story more powerfully.
If you’re unsure which rendering style best fits your project, consider working with a professional 3D visualization studio that can guide you through every stage — from concept to final render.